Category Archives: beauty
T-L.i.f.e. Blog:
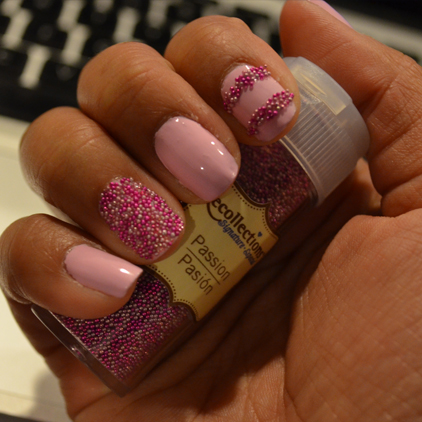
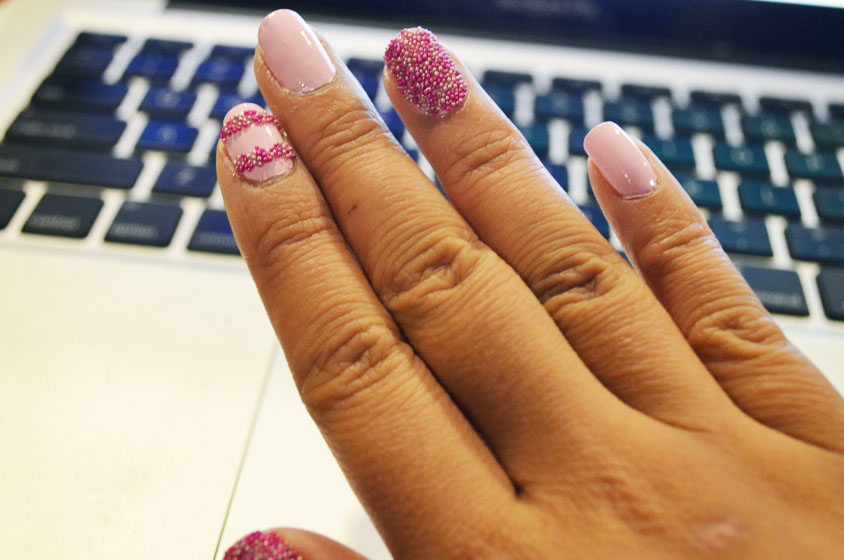
February Sweetheart Styles: DIY Caviar Manicure

February is the Month of Love and that means it’s time to put together those February Sweetheart styles. Along with the perfect dress, shoes, and accessories, a bright and fun manicure can help pull the whole look together!
Tamagotchi L.i.f.e. is all about trying new trends, and what better time is there to try something new than in the Month of Love? Caviar manicures have been seen photographed on many celebrities and all over fashion runways. There are nail kits out there that sell caviar nail polish for about $25 a bottle, but these nails can be easily replicated with microbeads from a craft store like Michael’s and your favorite nail polish.
First, you want to make sure to pick a nail polish color that matches the beads in case the beads don’t completely cover your nail. If you will be doing a complete caviar manicure, it is important to paint one nail at a time so that the beads will stick before the polish dries.
Once you paint your nail, you want to immediately pour the beads over your nail, using a bowl to catch any beads that fall. If your manicure looks bumpy you can push the beads down with your finger to smooth it out. Be sure to let the nails dry completely before moving around too much so that the beads don’t start falling everywhere! Also, you might be tempted to add a clear top coat to seal the beads, but you shouldn’t because, trust me, it will make the beads bleed color and not look as 3D.
Once your nails are dry, that’s it! It’s so simple and looks just like the caviar manicure you would get from a kit. You can also change it up by only doing a caviar nail accent or mixing two bead colors together. However you do this manicure, it looks chic and stands out – just like you will this month!
T-L.i.f.e. Blog:
DIY: Nail Art Made Easy!

Tamagotchi L.i.f.e. is all about keeping up with the latest trends and my favorite new trend is nail art. It’s a simple way to express my style and change it up with very little effort. Plus, it’s a way of making a statement when I want to complement an outfit to finish the look.
So here’s my typical nail routine: 1 base coat, 2 coats (if I’m lucky) of polish, 1 top coat, and wait for my nails to dry. Like the rest of us girls on the move, I’m always so eager to do something that I never fail to smudge my perfect manicure. I always thought how great it would be if there were a nail polish that could not get smudged.
Luckily, there have been tons of nail polish strips, decals, and appliques out there lately. These nail polish strips are easy to use – you just lay the decal on your nail and file away the extra material. The best part is that there’s no wait time for your manicure to dry. Since I tried the nail strips the first time, it’s been pretty tempting to head straight for the strips and abandon my drawer full of nail polishes.
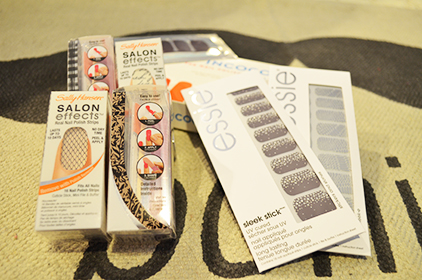
Here’s a look at my top 3 brands for nail strips:
Essie Sleek Stick Stickers
Essie makes nail appliques (meaning they’re not real nail polish and more like stickers) that come in mostly metallic and animal print designs. Each pack comes with 18 strips, a cuticle pusher and a nail filer. Although the designs of the strips are gorgeous and chic, they’re pretty hard to apply and file because they are a little stiff. Also, after wearing the strips for about a day, I had to take off 4 of the strips and replace them.
Incoco
I haven’t actually seen Incoco sold in stores, but I bought it from a mall stand. The great thing about this brand is that they make tons of solid and glitter strips that are made of real nail polish. Because it’s nail polish, it’s easier to file and fit perfectly on your nail. The only con is that it is sometimes difficult to separate the plastic cover from the nail polish strip.
Sally Hansen Salon Effects
These strips are by far my favorite. Inside each package are two sealed packages of 8 strips, a cuticle pusher, and nail filer. Similar to the Incoco strips, these are real nail polish strips that come in a variety of solids, prints, and metallic. Also, for everyone who’s budget conscious, these strips come in two sealed packages, which means you can turn one package into two manicures with a little craftiness.
These strips are my new addiction – saving me time to get back to my busy schedule. Now, I only have to schedule 10 minutes for a manicure instead of the 30 minutes I used to take. Anyone else know of any other great nail polish strips?
Blog Post By: Tiffany Chan, Southern California
T-L.i.f.e. Blog:
What is PH Balance?

PH ( Potential Hydrogen ) balance measures the acidity and alkalinity level in your hair. Ph values are measured on a scale from 1-10. The lower the PH the less acidic while the higher values contain more acid. The normal PH balance of our hair ranges from 4.5-5.5. Natural hair acidity prevents fungi and bacteria in the hair and scalp, which helps keep the hair cuticle sealed and healthy. Many hair products can disturb the natural PH in the hair. I suggest using a product once a week that will clarify hard water and sebum off the scalp. A clarifying shampoo and conditioner will restore your hair making it shiny, bouncy, and full of life. Malibu 1000 makes a product called Hard Water. I use this product and reap the rewards of healthy hair. Not only is the product easy to use, it’s inexpensive too. You also can go to your local hair stylist for a clarifying treatment layered by a conditioning treatment. If you go to the salon for service, I suggest going once a month or when your hair looks dull and lifeless. Always remember to wash regularly with products purchased from a salon or beauty supply store.
Feel beautiful, Be beautiful!
Blog Post By: Natalie Jaeger, Stylist, Lotus Salon Spa in Costa Mesa, CA
T-L.i.f.e. Blog:
BRAIDS!
The word is in, and braids are the trendiest hair fashion among young women. There are so many different ways to style your hair, and braiding really helps you change it up! The most common types of braids are those that start from the nape of the neck to the center of the head and then placed into a cute bun, even adding a bow to accessorize. I like to call these the “upside down braided buns.” They are perfect for any occasion! As someone who loves to braid hair, I have discovered that the waterfall braid has also been sported on many trendsetting fashionistas. This elegant looking braid has been the talk among young women on many fashion and beauty forums! It seems people just love the cascading look it gives them. Of course, you can also just do a simple braid, or the classic French braid, and it will still look as trendy as any of the other ones. Plus, braids are perfect for any type of climate. On a sunny day, you can wear one to stay cool and soak up the sun in shorts and a tank top with a simple bun; or, on a cold winter day, you can bundle up by adding an infinity scarf, an oversized knitted top, some skinny jeans, and a pair of cute boots. Then, top off this cozy look with either the upside down braided bun, or just a simple side braid and you’re good to go! Check out these photos of styles I just completed, including an all-new S-braid I just tried! I must say, I was quite impressed for my first time attempting this hairstyle. You should try it too-along with other classic styles! And, post your own pictures of your beautiful finished product to share your work of art. Tamagotchi L.i.f.e. is about making a fun, fashionable statement, and sharing your creativity with others. Happy braiding!
Blog Post By: Dilyara Castro, Southern California
